Sunday, September 11, 2011

Homemade Sauerkraut - WITHOUT a Crock!

We love Sauerkraut, however, I don't own a big ol' crock to made it. Internet to the rescue, and I've found a way to make yummy kraut with a minimum of stuff - just canning jars, cabbage, salt and boiling water.

First off, start with your cabbages.  These are from my garden, one of them really took off like a rocket. I have about 15lbs of cabbages here. I believe store cabbage should be fine, but I honestly can't remember if any pesticide/wax/chemicals are used on store cabbages. If you have a farmer market, be sure to ask. You want NOTHING on your cabbages - we'll deal with the dirt and bugs.

 Cut your cabbage in half. My way is to take a big honking serrated knife and stab it in the core. I then slice through the side. Repeat on the otherside so it breaks in half.

 Put the cabbage half flat side down, and cut it in half again to get quarters.
Take your knife and cut at an angle to cut the core out of each quarter.
 Here are the completed quarters and the cores at the bottom. Doing this will get rid of a LOT of the dirt and possible bugs - they hang right at the core.
 However, it's good to rinse off the cabbage, and I often remove the outermost leaf to make sure there isn't any dirt lurking. Give them a good shake to get most of the water off.
 This part is pretty explanitory, but hard to photo on your own - slice the cabbage. There is no rhyme or reason, just cut it into thin strips, aiming for abut 1/8" wide. Here's all the cabbage I have. Don't be to worried about uniform size, it's all ok. If you're really specific, you can get special things I believe to make very finely sliced cabbage for sauerkraut.
 Pack your clean quart jars with cabbage - and I mean PACK. Just cram as much as you possibly can crush in there by hand, making sure to leave about 1" of headspace - the cabbage should be crammed in until it's 1" from the rim.

Add 2 teaspoons of canning salt to each quart jar and bring a big pot of water to a boil. ALWAYS use canning salt when canning, never iodized salt. 

I didn't use my big pot, so I had to fill the one shown about 3 times to get enough boiling water. I used a pyrex measuring cup to just fill up the jars to the top.
Once full, I take a knife and slide it down and around in the cabbage to free up any air. I'll usually get enough air out of the jar to make the water level go down about one inch. Fill the jar back up to about 1/2" from the top with more boiling water.
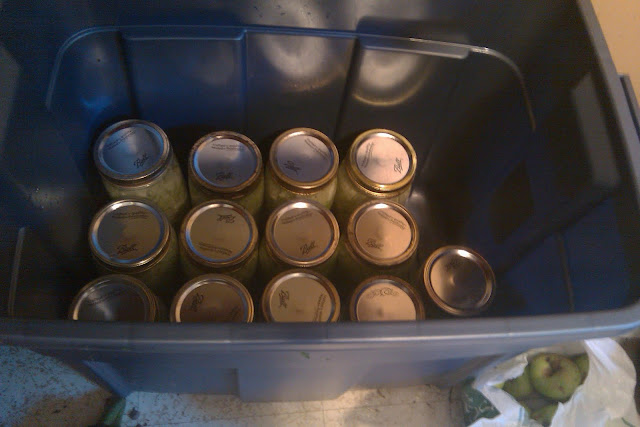
Put the lids and rings on, enough that you can handle the jars by the ring. Put them someplace cool, dark and dry - I use a rubbermaid container that hangs out under my counter in the kitchen. Unscrew the rings enough so they are barely on. You want your cabbage to be able to do it's own magic, and it will ferment - you don't want a cabbage explosion.

I'll update this in time, but the next step is waiting. In two weeks, you'll boil more water with a bit of salt in it (one pint of water with 1 tablespoon of salt), and top off the jars. Then they'll sit again. In two more weeks, again, boil water with salt (same one pint with one tablespoon), and top them off. This time, you'll wipe the rims, hand tighten the rings, and process in a waterbath canner for 40 minutes. All done!  You end up with a lovely sauerkraut that isn't vinegary or as salty as the store bought kind. It's delicious!

Sunday, August 14, 2011

Sweet Pickle Relish

This is my next favorite thing to make with pickling cucumbers, preferably the ones that "get away" and turn into behemoths that are no good for making dill pickles from. This is a sweet relish, not a spicy, dill, sour relish, and I've had comments from folks who state while they don't like relish, they really like this. My parents like to eat it out of the jar, but you don't have to go with that. It's delicious on anything you put relish on - hotdogs, burgers, or even to make tartar sauce from. It's not the neon green goo you get from a bottle, that's for sure!

I use a recipe I found on food.com, and use the automatic calculator to determine my ingredients based on how many cups of cucumbers I end up with after I grind them (more on that in a bit). Here's the recipe:


For the eight pints I did, the recipe is as follows (it's actually set for "7 pints" but I got 8 out).

  • 9 1/3 cups cucumbers, deseeded and chopped
  • 4 2/3 cups onions, chopped
  • 2 1/3 cups green bell pepper, chopped
  • 2 1/3 cups red bell pepper, chopped
  • 5/8 cup kosher salt
  • 8 1/4 cups sugar
  • 4 2/3 cups cider vinegar
  • 2 1/3 tablespoons celery seed
  • 2 1/3 tablespoons mustard seeds

First set is making sure you got the goods around. Not to difficult for the brine part - canning salt (never used iodized salt for canning, use clearly labeled canning salt), apple cider vinegar, sugar, celery seed and mustard seed.

Your hardware will be a couple of big bowls, a food processor, cheesecloth, measuring "stuff" (cups, spoons etc), a BIG pot, a waterbath canner, tongs to remove hot jars, a colander, a knife, and canning jars, lids and rings.

 The vegetable victims - cucumbers of any type, preferably the ones that got too big for any other use, bell peppers - I go with half green and half yellow/red/orange, and onions. Nothing fancy - I just use regular yellow/white onions.
 The best friend of this recipe - a food processor. I've had this thing for a long time. It has many quirks (like that nifty dial that is supposed to be speed, it doesn't work. We have two speeds, stop and go. "Go" operates when I engage the lock on the lid, regardless of setting (including if the setting is "off"). Yes, that is duct tape on it. No questions please... :)
 To start, take your cucumber. This is a massively overgrown pickling cucumber, one that I missed a few times apparently while harvesting for dill pickles.
 Cut it in half, and use a spoon to slice the seeds out. It doesn't need to be pretty, just get them out.
 Chop up the cucumber. Now, I usually go and deseed all of the cucumbers and then go all Iron Chef on them and chop them all at the same time. Only reason I chop is I can get them into the processor easier :)
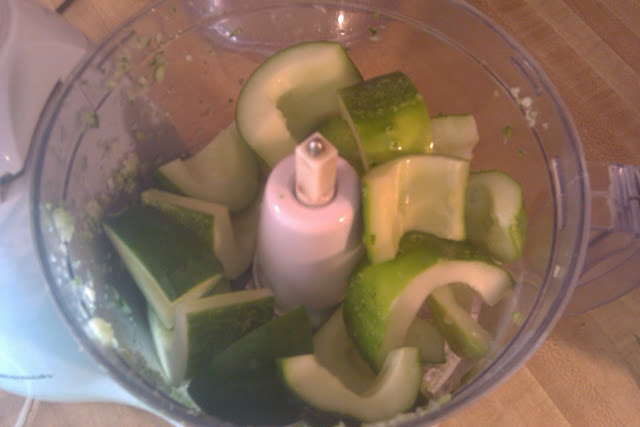
 Into the processor they go!
 Process them for a few seconds on high (the only speed I have), until they are all chopped up. You don't want a puree, but you don't want big chunks. Think about the size of the relish chunks in commercial relish, that's what you're aiming for. If they are too big or small, well, it's ok. It will taste so good, no one will notice!
Now stop! THIS is the step you find out how to set the recipe above to make sure you get the right amounts. The cucumbers are usually my limiting ingredient, so at this point, measure them and then fiddle with the number of pints for the recipe link. If you are between pints, go up a pint for the recipe. I ended up with 9 cups of chopped cucumber, and the 7 pint adjustment was just right.
 Since I now know how many peppers I need, I start running them through processor. In total you'll pretty much aim for 1/4 of green and 1/4 of colored peppers to the number of cucumbers. Too much math? just follow the recipe :) You'll want to wash your pepper and chop the same way as you did the cucumbers.
 As you did to the peppers, so you do to the onions. These are about 1/2  to the amount of cucumbers. Cut off the ends and the skin, and  into the processor they go. Watch for tears. I hate this part. Even if you aren't an onion fan, do try the recipe as written at least once. These will mellow and make a fantastic flavor when it's all together.  I had to put my onions in my big pot because the bowl was too full.
 Dump all the veggies into a very large vessel - I use my big pot. Mix it all up thoroughly. It will be pretty juicy :) Add the salt for the recipe and mix that in as well.
 Split the veggies into a HUGE bowl, or what I have, two bowls.
 Add cold water to the veggies for a nice soupy consistency. The goods need to sit for a minimum of two hours.
I'm missing the picture of the next step - after soaking the veggies, line a colander with cheesecloth and drain them well - an hour or so. This will make sure you get lots of yummy relish sauce, and not runny veggie juice.

Also missing in this is preparing your jars. I like to use pint jars - regular or widemouth. Clean them well - run them through a dishwasher if you have one (I don't, boo hoo! :( ). Make sure your lids and rings are ready.

Place the vinegar, sugar, celery seed and mustard seed in your big pot. It will seem like a LOT of sugar, but remember, relish is a condiment not a meal (my parents forget this). Stir it regularly, and bring it to a boil.
 Add all of the well drained veggies to the sugar/spice/vinegar mix, and stir well.
 Bring to a boil and then turn the heat down to let it simmer for 10 minutes. I was being assisted at this point by a small child, so no pictures of me ladling the relish into jars using a funnel, but I believe I have pictures of the funnel in the dill pickle blog. Use a slotted spoon to ladle your relish out, otherwise it will be too soupy.
 Once you get a couple pints of relish ladled out, you can dump the rest into a colander and drain it to get mostly relish and not so much "soup". Fill the jars to 1" from the top with relish, and then use a regular ladle to fill to 1/2" from the top with the brine.
Wipe the rims of the jars off with a clean paper towel, and then put their lids and rings on. Put into a water bath canner of hot water, and bring to a boil. Cover and set the time for 15 minutes (unless you live in those mountain regions, then follow whatever the guidelines are for water bath canning.) Remove, set on a towel and allow to cool. The lids should "pop" down after they cool, which means they've sealed. If they don't seal, either reprocess them in the waterbath with a new lid, or just put the jar in the fridge and use it in a couple weeks :)
 Enjoy! These will last easily over a year if kept in a cool, dry area. Always discard if the lid pops up meaning it's lost it's seal - that is due to growing yuckies :)


Sunday, July 24, 2011

Dill Pickles!!

It's pickle time again! 

Canning dill pickles is one of the easiest and foolproof recipes around - second to canning tomatoes probably (which are insanely easy).

You don't need much - dill, garlic, canning salt, white vinegar, water and cucumbers - pickling cucumbers work best as they are made to be "ready" when they're little and stand up well to the heat needed for canning. I prefer to use wide-mouth canning jars for pickles, it's easier to get the pickles out. To determine how many jars you need, pack the cucumbers into the jars before doing anything. However many jars it takes to get them all in is how many you need

To make the brine for 3 quarts of pickles, use 5 cups of water, 1 1/3 cups of vinegar and 1/3 cup of salt.  Keep those ratios if you're making more or less.

First step I do is to soak the cucumbers overnight or for a few hours in ice water - just keep adding ice to keep them super cold. I don't know why this helps, but they seem to be nice and crunchy crisp when you eat them. Some recipes use alum to keep the crispness, but I prefer to avoid that. Many premade pickle mixes use alum and other stuff, read the ingredients. Besides, making from scratch is just as easy.

 Make sure you get your jars ready. Make sure you have new lids - the lids should not be reused, but the rings can be used over and over. Just check them for rust and dents. Check the rims of the jars for any cracks or chips - if there are any, don't use that jar. Wash them well with hot soapy water and rinse thoroughly. If you have a dishwasher, you can run them through that.

 I didn't get around to planting dill, but many grocery stores will carry dill or baby dill fresh in the herbs section of the produce area. For three quarts, I used one and a half packs of dill. I like dill. If you have plants, you can use the leafy fronds and the flower heads. The garlic I purchased was HUGE, and I used two cloves per jar. If it's smaller garlic, you can use more. Peel the skin off the garlic.

 Get the water bath ready. I got this from some people who sold me a ton of jars, but you can find these all over at garage sales, or buy them new. I don't know how many quarts mine is, but it's big. Some people say you can't waterbath on ceramic top stoves, apparently some don't get hot enough, or there is concern the waterbath will break it. My stove cost me a whopping $50, so if it breaks, well, I'm not out much. I've canned on it for a few years now, with no issues. Just be gentle setting the pot on there. I fill it to about 5" from the top - it's easier to add water than to scoop out boiling water once you get the jars in. Set it to go on high heat.
Put your lids in a small pot with water and bring to a boil to clean those too. The heat also makes the lids seal better.
 
Measure out your salt, water and vinegar. Canning salt does not have iodine like table salt - be sure to use only canning salt, not table salt. There's nothing special about white vinegar, but if you do a lot of pickles, it makes more sense to buy jugs of it.

Bring the salt, water and vinegar to a boil, and while it's heating up, pack your cucumbers.
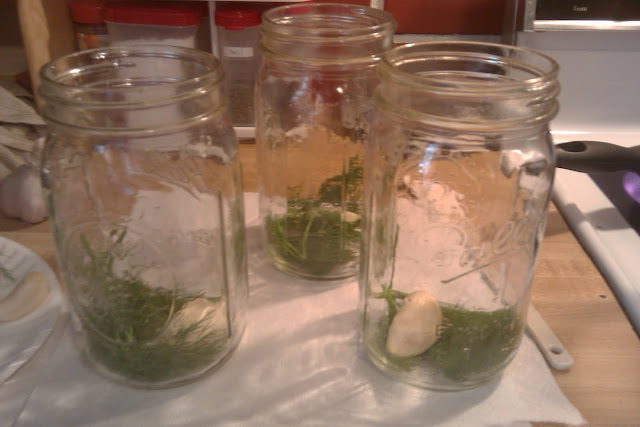
  Prep your jars - I put a few bunches of dill in and one of the cloves of garlic in each. There is no real rhyme or reason to how much is needed, just toss it in there.
 Pack the cucumbers in.
Put a few more bunches of dill in and the other clove of garlic.
 Top view.

Canning funnels are SUPER nice to have - they are cheap, but they are heat resistant and make canning anything hot much easier. You can find them in the canning section of most stores.
 
 Fill the jars up to about 1/2" from the top with the boiling brine.Wipe the rim of the jar off gently with a paper towel to make sure there isn't any extra stuff that stuck to it that might interfere with the seal.

 Put the lids on and screw the rings on so they are snug, but not super tight. Put them in the waterbath that should be close to boiling or boiling, and add enough water so the lids are under about 1" of water. Once the water is boiling again, put the lid on the waterbath and set a timer for 15 minutes.

Gently take them out of the water bath and place on a towel on the counter. They are HOT. You can wipe the water off with a cloth around them. Just let them cool off naturally, and after a while you'll hear them "pop" and the lid will dent in. This means they sealed, and are ready to sit. You'll want to put them in a cool dark place for about 8 WEEKS - yes, that long. It will be worth it! They will last for about a year as long as the lid is sealed. Refrigerate after opening them and eat them within a few days or whatnot.
If they don't "pop", go ahead and recheck the rim of the jar and reprocess in the waterbath

Enjoy!

Thursday, May 5, 2011

Wild Turkey Alfredo and stuff.....

So, sometimes I hear folks don't care for wild turkey meat - it's too dry, it's too tough, it's just no good.Well, being I can't follow a recipe any more, and rather make up my own, I thought today of what to do with the wild turkey breast from the turkey Terry shot a few days ago. Not sure why the inspiration hit at work, but it sure did, and this is what we had for dinner tonight. It makes a LOT of food, so don't ask me about calories or serving, but it's all good stuff.


Ingredients:
2 whole wild turkey breasts, or most of them if they haven't been shot too badly (for non wild turkey, it's about 4 large boneless chicken breasts).
1 package of bacon
Coarse black pepper
Garlic salt

1lb or so of fresh broccoli
1/2 a pound or so of fresh asparagus
1 of those boxes of baby portabella mushrooms

4Tbs of butter
1 pint heavy cream
1 tsp white pepper
8oz of freshly shredded Parmesan cheese (keep some set aside for topping)
1 cup milk
1cup shredded mozzarella cheese

A big ol bag of egg noodles

Directions:
Slice the turkey breast in 1/2" strips, checking carefully for shot, feathers and any sinew or yuck. Lay two slices of bacon down, overlapping in the middle, in a cookie sheet with sides, the long way of the sheet. I made four long rows. Lay the turkey breast strips on the bacon.  Sprinkle the garlic salt and pepper over the turkey. Lay the rest of the bacon over the top of the turkey so you have four long strips of bacon and turkey goodness. (Yeah, it's on the cutting board. Learn from me and do it on the cookie sheet first!) Pic is just the bacon, then the turkey. The final bacon layer isn't on there.


Put the bacon and turkey goodness in the oven at about 350, uncovered. It will need to cook for about an hour or so, maybe less. I wasn't keeping track well.


Get your vegetable goods around. I picked the fresh asparagus from the garden and used that, I didn't have a lot but enough to use. Cut the asparagus in the 1" pieces, and cut the broccoli into 1" pieces, with the stem cut into 1/2" pieces. Wash the mushrooms, remove the stems and slice. Saute the mushrooms in a bit of butter for a few minutes, and then add to the broccoli and asparagus. Put in a pot with about 1/4-1/2 cup of water and steam. I think it cooked for like 20 minutes? You don't want mush, but it should all be tender.

Get the sauce going by melting the butter in a pot, and add the cream, milk and white pepper. Bring to a simmer and add the Parmesan cheese. Stir frequently at about medium low to medium heat, until all of the cheese is completely melted, and the sauce is smooth and creamy. Add the mozzarella cheese and stir constantly until it completely melts and the sauce goes from sticky to creamy.

While you are getting the sauce things around and starting, start a big pot of water and bring to a boil. I like to add a Tbs of sea salt to the water, and then dump in the noodles. While your tending the sauce, the noodles will cook, and should finish about the time the sauce is done. Drain the noodles. I just dump them out of the big pot into a colander and use the big pot to put everything together.

When the turkey and bacon is done (bacon is crisped up but not burning), take it out and cut the strips in half. Move the halves to a paper towel lined plate to drain a bit, and then cut the strips in about 1/2" wide pieces. Dump the pieces into the big pot. Drain the veggies and dump those in. Pour the sauce over everything and toss gently. Add the noodles back and toss again. Top with some of the fresh Parmesan you hopefully set aside, and eat!!


Sunday, April 24, 2011

How to Process Chickens at Home

 With the rising cost of food and especially meat, many people are looking to closer to home to start raising their food. Backyard gardens are on the rise, and many people are starting to raise their own chickens for eggs. Meat chickens are one meat source that can be raised with minimal space (compared to say, a cow), convert feed efficently, and can be processed at home with not much more than a sharp knife and a big pot. 

This post will go through all of the steps to process a chicken at home.


Obviously, this is "graphic". If you aren't here to see how meat is made from a living animal, stop here and go check out another blog. If you are anti-meat, stop here. If you can't stand the sight of anatomy, stop here. If you are not interested in how to process a chicken, stop here.

Ok.

Here's a shot of some of the meat birds. They are cornish cross from Tractor Supply. They are seven weeks old, about the average age of all the chicken you get in a store. They are fed a 20% protein feed, no medication/antibiotics/hormones etc. These guys eat a LOT - in seven weeks, one dozen consumed about 200lbs of feed. They need a lot of water as well, close to the end, the dozen was consuming about 3 gallons a day.


First step not shown is getting your chicken. These guys are lazy and don't really run much. Pick them up and carry them to your designated slaughter spot. My spot is in the garage, with a rope hung from a gambrel pulley. The rope has a loop at the end, which I double around to make a noose of sorts that slides easily. I place the chicken's feet in the noose, and gently lower them to hang. Chickens will stop struggling and hang limp when upside down.

Find the jawbone of the chicken on one side. I use a scalpel, since it's the absolute sharpest blade I can get. You want your cut to be fast and quick, for minimal suffering to your chicken. Think about if you cut yourself on a very sharp knife - the pain doesn't start for a few minutes. In the chicken's case, in a few minutes, they will no longer be alive to have that pain. Cut deep enough to slice the artery, but not so deep you cut the trachea. I hold the scruff of the chicken to make the skin tight against the throat - not choking him, but snug.
 I do one fast slice, and then lower the chicken into a contractor bag inside a bucket that has some heavy stuff in the bottom. This way, they are placed in the dark, they don't struggle, and they will pass away without panic. At the end of their life, when blood loss is nearly complete, muscle spasms will occur. The bucket keeps blood and whatnot contained.
 I like to wash off the chicken to remove the blood and any dirt or poo. I find it makes the scalding not have the stink many complain about.
 I keep my scald water on the stove, in an old water bath canning pot. I fill about 2/3 full, and then squirt in a good squirt or two of dish soap. This helps work into the feathers to loosen, and also keeps the smell down. I find the prewash with the hose helps heat transfer, so I lose less heat when scalding, which means less time to bring the water to temp. I aim for about 150 degrees, and check the water temp between birds.
 I do one bird at a time. Put him in the water, and use a pair of tongs to swish him around. You want all parts of him to get nice and warm. The water temp is also not high enough to burn you, or cook the meat.
 Scalding is done when you can grasp a wing feather and it pulls out, instead of pulling the bird out of the water. This is usually under a minute.
 Start plucking. Feathers will slide right out, I like to go against the grain of the feathers to really get them out fast.
 You can take feathers by the handful.

 
The wing feathers are little, just slide them off. I don't do a perfect pluck, just get the majority off. I will do a final go over when I wash the bird after gutting.
 
The feet have a skin on them, that can be peeled off. Feet make a good stock.
 
One cleaned off foot.
 Find the joint at the hock, and place the blade there. You should be able to cut right through. If you are struggling, you are too high or too low.
 
Once the cut is nearly through, cut from the bottom of the joint.
 
The feet come off.
Cut along the back of the neck....
All the way from the base of the head to the back.
 Slide the skin up on the base of the head, and cut the head off at the base.
 
 Peel the skin off the neck and the "tubing", and then cut off the neck skin with the head attached. Leave the tubing to keep food from coming from the crop out.
Peel the tubing - esophagus and trachea - from the neck.
 Turn the chicken over, and separate some of the skin off the breast. The crop is stuck to the skin and the breast meat. Work it off both, so there is a sack attached to the esophagus, and then the tubing going into the body.
 Can see the lumpy crop with food in it here. I'm working it off the skin.
 Completely separated crop. If you leave the esophagus intact, food and such won't come out. I like to feed my chickens a bit before slaughter, so there is stuff in the crop. You don't have to, but it can get tricky to initially peel it. With food in it, you can grab it and work it apart.
 I'm pulling apart the crop and tubing, there are bits of meat/glands attached. Just peel them off. I have the neck bent to the side (left). Cut the tubing off as deep down as you can, but be careful not to slice the breast meat.
 Put the bird back up again (breast down), and find a good spot to cut the neck off. I just use my scalpel - young Cornish birds don't have a lot of hard bone. I actually use a scalpel all the way through, no other knives.
 I'm starting the cuts to gut the bird. They have pelvic bones, and I use these as a guide for my first cut. I cut toward the bone, so I can open the bird up without cutting the guts.
 I make another cut on the other pelvic bone, so I have two slits, one on each side, and about 1" or so wide.
 I work my fingers in carefully and use the knife to open up the two holes until I open the gut cavity. Once I have both holes open, I just connect them by cutting the skin.
 Find the end intestine that comes out to the vent. Loosen it off the gut cavity.
 Cut around that tube by cutting around the vent.
 I usually cut the tail off here at this point.
 Reach in and use your hand to slide around the gut cavity, loosening up and tearing off the thin membrane that holds everything to the body. Be fairly gentle, so you're not ripping into the guts.
 Reach to the front, and grab the heart and just pull everything out.
 The lungs also need to come out. They are wedged between the ribs sort of in the middle. They are the bright red parts in this picture. I use my finger and slide it between the ribs, and pry them out. There are special tools, but I find I can pop them out with my fingers fairly easily. You can also see the "beans" - they are the cream colored bean shapes.This is a young rooster.

 All of the parts. The lungs are on the lower left. You can see the ridges where they sit in the ribs.

 At this point, you can throw out all of the parts, but many bits are great for stock. To use the liver, you need to carefully remove the gallbladder. It's a greenish/blackish pod, and is stuck to the liver. Carefully cut it's base out and remove. If you rupture it, immediately remove and wash off the liver.
 I'm holding the gizzard. This is the big and HARD thing in the gut cavity. It's hard to mistake it for anything else.
 To prepare the gizzard, just cut in half...
 Open it up....
 And then peel the yellow membrane off.
 Innard parts - top is lungs, then heart below them, liver to right of the heart, gizzard and then gallbladder next to it. At the bottom are the intestines. This was a boy rooster, so his cojones are on the top to the right of the lungs. These look like white beans, and are stuck to the back. If you have an older rooster, these can get big, over an inch long.
 One last step is to remove the kidneys. I find the easiest is to "scramble" them with my finger, they are buried almost in the back bone. When I wash the bird, I'll flush the bits out with water.
 Washing the bird :) I use this time to really clean up any stray feathers.
 Clean bird.
 Finishing touches. I like to use the back skin to hold the legs together to keep it easy to pack him up. Just cut a hole in the skin, about 1" up from the edge. It only has to be about 2" wide.
 Making the cut....
 Tuck the legs into the skin hole to truss them up.
 For extra fancy, flip the wings back to tuck them.
 Trussed up and ready to pack!
 You can use freezer bags. I love my Foodsaver, and these guys fit perfectly into the large rolls. I think they store better as well.
 At this point, the bird should rest in the fridge. You don't want to cook them right away, you need to let nature do it's thing and let rigor pass. If you grab a leg and it's not moving easily, it's not ready to cook. I let them rest in the fridge for 2-3 days, and then put them in the freezer until I'm ready to cook them.

When doing this the first time, expect about an hour of work. You'll get faster over time, some folks can do everything in about 15 minutes or less per bird, and there are many tools (such as pluckers) that can really speed things up. However, this is just to show that you can process a chicken with no more than a pot and a sharp knife.